Sourdough Bread: Successes and Failures

I’ve had a love/hate relationship with sourdough bread. Back when I first began trying to make it 3 or 4 years ago, I never mastered it and it ended up being more hassle than it was worth. Last year, I tried making my own sourdough starter out of rye flour. It turned out great and I spent the next few months making all sorts of yummy sourdough breads, but still really couldn’t get the bread loaf down. My family went on a grain-free diet for awhile, so my sourdough starter was ruined.

A few weeks ago, I decided to try again. I started my sourdough from rye flour. Many instructions will tell you wheat or rye is fine, but I’ve found that rye is the easiest to get started. It bubbles up and ferments properly without a lot of worry. After about a week, when my culture was ready, I made some no-knead sourdough bread. I made two different recipes. One was a complete flop which some member of my family said needed cutting with a chainsaw. :-) The second turned out beautifully. Since then, I’ve made sourdough biscuits and crackers. Tonight, I have some sourdough rolls mixed up ready for finishing up in the morning for our midday meal.

I’ve made bread since I was nine years old, so I was already aware that bread making is an art and a skill. If you add sprouting grain and soaking flour to your bread making regime, then it is a new art form and skill that takes developing. Sourdough is the same way. It takes learning what the dough needs to feel like, how to handle it, what to add.

I’m slowly gaining new knowledge in the area of sourdough. Eventually, I hope to have some new recipes of my own to share. For now, I’m going to share a few I’ve made and we’ve enjoyed.


Sourdough Starter instructions:

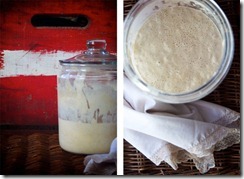
I found Jenny, from Nourished Kitchen, to have the best instructions on sourdough starting. If you follow her instructions, using rye flour (or wheat if you don’t have access to rye), then you will be on your way to making wonderful sourdough products. Once the sourdough is ready to bake with, I switched to wheat flour. If I want to bake a big batch of something, I’ll feed it a cup of flour and 2/3 cup water for a couple days and then bake with it. Stirring vigorously is very key to the success of the starter. I found that stirring it for about a minute rapidly will make it nice and bubbly and foam up like a proper, active starter should.

sourdoughstarter


Sourdough Baked Goods:

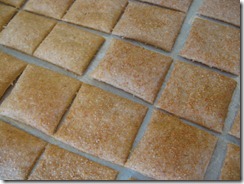
Sourdough Crackers are probably our favorite baked item I’ve made with my starter. These crackers are super easy and delightfully crunchy. Don’t roll them very thin, because if you leave them slightly thicker than you would normally do for crackers, they will puff up and be beautiful, crunchy and delicious.


sourdoughcrackers


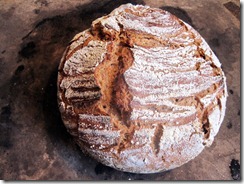
Sourdough No-Knead Bread is a very delicious, easy bread. It rises beautifully. I made mine with Kamut flour, but I think I’ll try Spelt next time. It has a very crunchy, artisan crust.


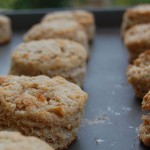
One of my personal favorites is Sourdough Biscuits. I tried this recipe last year. They are super easy to make and delightfully sourdoughy good. :-)

sourdoughbiscuits


Do you have any sourdough stories? What are your favorite recipes? What are some recipes that you would like to see me make and share from my sourdough starter?
Cheddar Biscuits

These biscuits are light, flaky and full of cheesy goodness.  It is our family’s favorite “soup bread”. Someday, when I get my sourdough starter “restarted”, I shall post the sourdough version I came up with. It was delightful!

HEAT oven to 450ºF.
MIX first 5 ingredients in medium bowl. Cut in butter with pastry blender or 2 knives until mixture resembles coarse crumbs. Stir in Cheddar. Add milk; stir until mixture forms soft dough.
PLACE on lightly floured surface; knead 8 to 10 times or until smooth. Pat out dough into 6-inch square. Cut into 9 squares; place, 2 inches apart, on baking sheet.
BAKE 10 to 12 min. or until golden brown.

How to: Sprouting Grain for Baking

I’m posting this to participate in GNOWFGLINS Simple Lives Thursday! :-)


How to Sprout Grain for Bread and Baking:


Several years ago, when I was around 17 or 18, I first attempted sprouting grain and making bread from it.  A bread-baking veteran of 8 years, I knew bread making quite well, but sprouted grain was beyond me at the time and I gave it up.  Last year, I started trying again. This time, I used our 2 dehydrators (we owned one and then someone gave us another one) and mesh sheets to dehydrate the grain instead of the oven.  I bought some grain from To Your Health Sprouted Grain to compare with mine.  I now have conquered the tricks of sprouted flour and now I am attempting a new challenge, sprouted sourdough bread.  We’ll see how it turns out. I made my own sourdough starter, and so far, so good. :-)

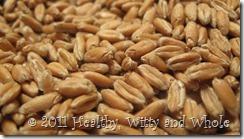
Sprouting the grain is a some of a hassle, but well worth it. I sprout hard red wheat and it makes the softest, flavor rich loaves.  Unsprouted, red wheat is dense and make small, unsavory loaves. I’m happy that it makes such a difference to sprout, since red wheat is so much more nutritious than white.

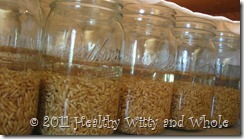
To sprout, I soak my grain in water for 12 hours.  This helps gets rid of all the bacteria and enzyme inhibitors in the grain.  After soaking, I drain the water and let it sprout all night. The sprouts should be barely visible, at the most an 1/8 of an inch, no more or else your bread will flop.  That’s teary-eyed experience speaking. ;-)

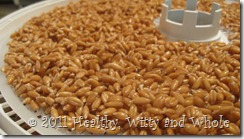
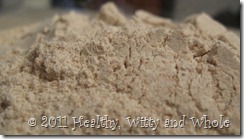
Then, I spread the grain on my dehydrator racks that have mesh screens on them and dehydrate at least 12 hours, sometimes more like 18. The grain has to be very dry.  That’s very important. I ruined a grain mill once. *ahem*  *blush*  Grind like normal whole grain and use for any recipe asking for flour.  Because it has a little bit more moister than other flour, you will have to use a little more than you use for whole wheat flour, but about equal amounts with white flour.


Benefits of Sprouted Grain:

Why is sprouting grain so good for you? For the answer, I’ll go to the “professionals”, those who can say it much more eloquently than I could ever try to.

Kelly the Kitchen Kop says that:

“Sprouting radically changes grains by:

  1. Changing the composition of starch molecules, converting them into vegetable sugars, so the body recognizes and digests sprouted grains as a vegetable.
  2. Enzymes are created that aid digestion, complex sugars are broken down which can eliminate painful gas, and vitamin and mineral levels increase.
  3. Sprouting neutralizes potent carcinogens and enzyme inhibitors, as well as an acid that inhibits absorption of calcium, magnesium, iron, copper and zinc.”

Nourished Kitchen blog says: “When examining the nutrient density of sprouted wheat to unsprouted wheat on a calorie-per-calorie basis, you’ll find that sprouted wheat contains four times the amount of niacin and nearly twice the amount of vitamin B6 and folate as unsprouted wheat; moreover, it contains more protein and fewer starches than non-sprouted grain and as a further boon, it is lower on the glycemic index making it more suitable for those suffering from blood sugar issues.”

There is lots of information from To Your Health Sprouted Flour and Summers Sprouted Flour Company, which are good places to buy sprouted grain/flour if you can’t do it yourself.  I’ve also heard a lot of research saying that those who are gluten-intolerant can eat sprouted flour products because of the enzymes being activated.

soaking_grain
Soaking the grain for 12 hours
sprouted_grain
A close up of the sprouted grain. It just needs to be slightly sprouted.
sprouted_grain
Spreading the wheat out on mesh sheets in the dehydrator
dehydrating_grain
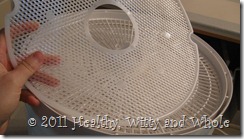
The mesh sheets
dehydrating_grain
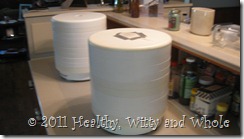
Our 2 dehydrators
sprouted_grain
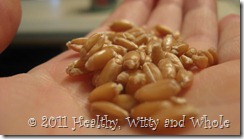
Dried wheat after about 14 hours. Ready to grind!
sprouted_grain_flour
Fluffy ground flour waiting to be made into some delicious baked good!


Witty Wednesday

 I’ve been trying to master sprouting wheat berries for bread.  I kept getting the sprouts way too long, and the bread flops.  Finally, the last batch I sprouted and dried worked! I made bread today (and rolls) and they turned out beautifully. I’m quite thrilled. I’ll post a recipe soon. And I hope to have a tutorial on how to sprout grains and an article on why it is so good for you!

“Whole grains contain phytic acid in the bran of the grain.  Phytic acid combines with key minerals, especially calcium, magnesium, copper, iron, and zinc and prevents their absorption in the intestinal tract. Soaking, fermenting, or sprouting the grain before cooking or baking will neutralize the phytic acid, releasing these nutrients for absorption. This process allows enzymes, lactobacilli and other helpful organisms to not only neutralize the phytic acid, but also to break down complex starches, irritating tannins and difficult-to-digest proteins including gluten. For many, this may lessen their sensitivity or allergic reactions to particular grains.  Everyone will benefit, nevertheless, from the release of nutrients and greater ease of digestion.”  ~ Sue Gregg